We’ve launched a new Craft Project with Diana Ching who will set a series of creative projects every Thursday on our website and social media to give you ideas of things you can work on at home to build your own piece of art over a period of weeks.
Last week’s “summer” project may have come a bit late in the day! We’ve had the heatwave, we’re past high summer and September starts to feel quite autumnal. I think this is a beautiful time of year, pleasantly mellow and still with plenty of opportunities to inspire us creatively.
This week’s project is still quite simple in terms of the materials you’ll need which, like last week, are basically any plain white paper, drawing and colouring materials, and collage papers (magazines, junk mail, anything!). Oh and a glue stick and scissors! I’m calling this project “Autumn Wreath”. I’ll give you the basic steps below but feel free to adapt your own work however you wish.
1. Go for a walk in the park or look in your garden and pick up half a dozen or so different leaves – any size, shape or colour. Take them home and do some simple sketches of them on white paper. They don’t have to be perfect drawings but try to convey the different shapes. Fill at least two pages with these drawings.
or
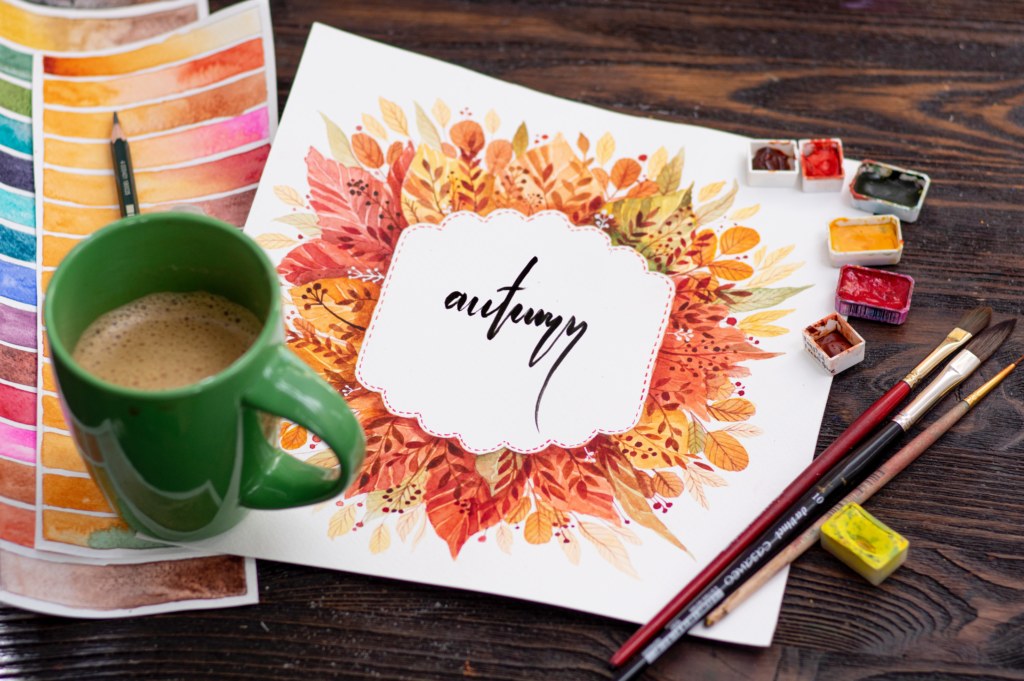
If you don’t have access to real leaves, try copying some of the ones in Pic 1 below.

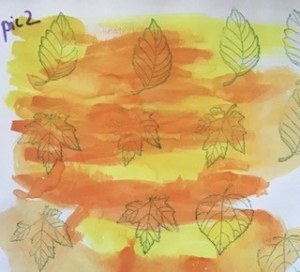
2. When you have filled at least two pages of leaves, add colour – if you have paints, mix different colours together and add a light wash all over the pages (you’re not “colouring in” the individual leaves, you’re looking to create random colour on each leaf so they are artistically multi-coloured!). If you don’t have paints, use coloured pencils or pastels if you have them. The idea is to end up with something like Pic 2.
3. Now get your magazine/collage papers out and draw some leaf shapes on pages that have pictures in similar shapes, sizes and colours to your painted leaves. Try to get a good variety of colours in the individual leaves, as well as different textures and patterns.
4. Get a pair of sharp scissors and cut out all your leaves – not too precisely (that would take a long time), just so you can see the difference in the different shapes.
5. Take a fresh sheet of white paper. Draw around a tea plate (for example) to get a nice circle on the centre of the page.
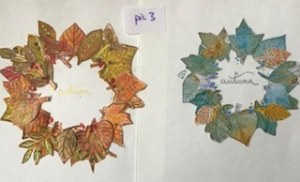
6. And now for the fun part: look at your pile of cut-out leaves and without gluing them down yet, start arranging them around the circle to create a pleasing effect. Don’t stress too much about it, random is good. When you start to form an idea of what you want the finished piece to look like, get glue-ing! See pic 3.
7. When you’ve glued all your leaves in place you may want to add a few decorative touches in the form of berries, acorns, etc – felt-tip pens are good for this, or if you have any crafty embellishments they can be fun too.
8. If you want to take the idea further, you could make a cardboard ring instead of paper to create your wreath… tie on a piece of string and hang it up somewhere in the house to remind yourself of the beauty of the season. See pic 4.

Download these instructions in PDF mode for printing.
That’s it! Simple but effective. Anyone can have a go at this – it’s a nice project for children too – and you may find yourself making more than one.
I look forward to seeing the results on this post – and please also say if you have any thoughts/requests for future projects, this is all about what you’d like to do! You can send photos of your creations to Connie at MFT by emailing connie@maryfrancestrust.org.uk – please mention whether you give MFT permission to share them on social media and whether they can mention your first name or if you prefer to stay anonymous. Thank you!
Diana